
Garden edging is a great choice to maintain your garden. It is the most suitable option for those who want a clean and defined border in their garden. It is one of the most popular options among the gardeners. Further, through this blog, you will be provided with all the information related to this interesting platform. You just need to stick around with this article till the end of the discussion. This blog is all about gardenedgingexpert.com/blog.
Moreover, this fact has been considered that you might be having several doubts and concerns in your mind related to this platform. However, no worries. This blog comes up to provide you with the best possible info available about this great platform. You just need to be vigorously present around this blog till the end of the discussion. Furthermore, this blog is going to be very interesting and exciting for those who are looking forward to maintaining and providing enhanced look to their gardens. Hence, without wasting any time, it is time to start this blog.
Introduction
Garden edging is a crucial aspect of landscaping that not only enhances the aesthetic appeal of your garden but also provides practical benefits. Proper edging helps to define garden beds, create clear boundaries, and prevent the spread of grass and weeds. In this comprehensive guide, we’ll explore every detail about garden edging, including its benefits, types, materials, installation processes, and maintenance tips. By the end of this article, you’ll be equipped with all the knowledge you need to create beautiful and functional garden edges.
Gardenedgingexpert.com/blog : Importance of Garden Edging
There are so many garden edging techniques available in the market. However, before knowing them, it is important to know why edging is essential for your garden. One of the major needs for garden edging is that it gives a clean and polished look by defining the borders of your garden. Not only this, it also enhances your garden and its pathways. Moreover, this adds structure to your outdoor space, enhancing its visual presentation. Further, proper garden edging helps to maintain the grass and weeds into the flower beds and garden pathways.
Benefits of Garden Edging
- Aesthetic Appeal: Garden edging adds a clean, finished look to your garden, creating a visually pleasing contrast between different areas.
- Weed Control: It helps to prevent the spread of grass and weeds into flower beds, reducing maintenance efforts.
- Improved Drainage: Proper edging can enhance drainage by directing water away from plant roots.
- Soil Retention: It keeps soil and mulch in place, preventing erosion and maintaining the integrity of garden beds.
- Enhanced Lawn Care: Edging creates clear boundaries that make mowing and trimming easier and more efficient.
- Increased Property Value: Well-maintained garden edges can enhance the curb appeal of your property, potentially increasing its value.
Types of Garden Edging
There are various types of garden edging to choose from, each with its unique characteristics and benefits. Here are some of the most popular options:

1. Metal Edging
Metal edging, typically made from aluminum or steel, is known for its durability and sleek appearance. It can be easily shaped to create curves and straight lines, making it versatile for different garden designs.
Pros:
- Long-lasting and durable
- Low maintenance
- Clean and modern look
Cons:
- Can be expensive
- May require professional installation
2. Plastic Edging
Plastic edging is a budget-friendly option that is easy to install and comes in various styles and colors. It is flexible, making it ideal for curved garden beds.
Pros:
- Affordable
- Easy to install
- Available in various designs
Cons:
- Less durable than metal
- Can become brittle over time
3. Wood Edging
Wood edging offers a natural look that blends well with garden landscapes. Common choices include treated lumber, cedar, and redwood.
Pros:
- Natural appearance
- Versatile design options
- Relatively easy to install
Cons:
- Susceptible to rot and pests
- Requires regular maintenance
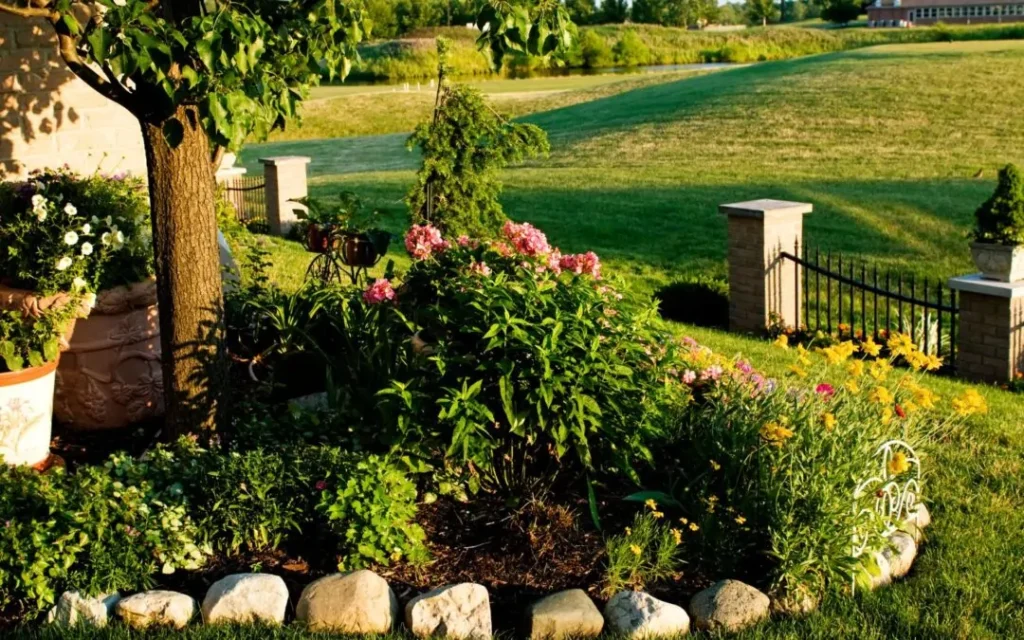
4. Stone Edging
Stone edging provides a timeless and elegant look. Options include natural stones, bricks, and concrete pavers.
Pros:
- Highly durable
- Aesthetic appeal
- Low maintenance
Cons:
- Can be expensive
- Heavy and difficult to install
5. Concrete Edging
Concrete edging is a permanent solution that can be customized with various shapes, colors, and textures. It is often used for creating intricate designs and patterns.
Pros:
- Very durable
- Customizable
- Low maintenance
Cons:
- Requires professional installation
- Higher cost
Choosing the Right Material for Your Garden
Selecting the right material for your garden edging depends on various factors, including your budget, garden style, and maintenance preferences. Here are some considerations to help you make an informed decision:
- Budget: Determine how much you are willing to spend on garden edging. Materials like plastic and wood are more budget-friendly, while metal and stone can be more expensive.
- Aesthetic: Consider the overall look you want to achieve. For a modern and sleek appearance, metal edging is a great choice. For a more natural and rustic look, wood or stone edging would be ideal.
- Durability: Think about the longevity of the material. If you want a long-lasting solution with minimal maintenance, metal or stone edging is preferable. Wood and plastic may require more upkeep over time.
- Installation: Assess whether you can install the edging yourself or if you need professional help. Plastic and wood are easier to install, while stone and concrete might require expert assistance.
- Maintenance: Consider how much time and effort you are willing to invest in maintaining the edging. Low-maintenance options like metal and stone are ideal for those who prefer minimal upkeep.
Installation Process
Installing garden edging can be a DIY project or may require professional help, depending on the material and complexity of the design. Here are step-by-step instructions for installing different types of garden edging:

1. Metal Edging Installation
Materials Needed:
- Metal edging strips
- Stakes
- Mallet
- Hacksaw (for cutting)
Steps:
- Plan the Layout: Outline the area where you want to install the edging using a garden hose or string.
- Dig a Trench: Use a spade to dig a trench along the outline. The trench should be deep enough to accommodate the edging strips, leaving about half an inch above ground level.
- Place the Edging: Insert the metal edging strips into the trench, ensuring they are straight and level.
- Secure the Edging: Drive stakes into the ground on the inside of the edging strips to secure them in place.
- Join the Strips: If you have multiple strips, join them using connectors or by overlapping the ends and securing them with screws.
- Backfill the Trench: Fill the trench with soil, pressing it firmly against the edging to hold it in place.
2. Plastic Edging Installation
Materials Needed:
- Plastic edging rolls
- Stakes
- Hammer
- Utility knife (for cutting)
Steps:
- Plan the Layout: Mark the area where you want to install the edging using a garden hose or string.
- Dig a Trench: Use a spade to dig a trench along the marked outline. The trench should be deep enough to bury the bottom edge of the plastic edging.
- Unroll and Cut the Edging: Unroll the plastic edging and cut it to the desired length using a utility knife.
- Insert the Edging: Place the edging into the trench, ensuring it is level and straight.
- Secure the Edging: Hammer stakes into the ground on the inside of the edging at regular intervals to keep it in place.
- Backfill the Trench: Fill the trench with soil, pressing it firmly against the edging.
3. Wood Edging Installation
Materials Needed:
- Wood edging boards
- Stakes
- Hammer
- Saw (for cutting)
Steps:
- Plan the Layout: Outline the area where you want to install the edging using a garden hose or string.
- Cut the Wood: Cut the wood boards to the desired length using a saw.
- Dig a Trench: Use a spade to dig a trench along the marked outline. The trench should be deep enough to bury about half of the wood board.
- Place the Edging: Insert the wood boards into the trench, ensuring they are straight and level.
- Secure the Edging: Hammer stakes into the ground on the inside of the wood boards to secure them in place.
- Backfill the Trench: Fill the trench with soil, pressing it firmly against the wood boards.
4. Stone Edging Installation
Materials Needed:
- Stones, bricks, or concrete pavers
- Mallet
- Level
- Sand (for leveling)
Steps:
- Plan the Layout: Mark the area where you want to install the edging using a garden hose or string.
- Dig a Trench: Use a spade to dig a trench along the marked outline. The trench should be deep enough to bury about half of the stones.
- Level the Base: Pour a layer of sand into the trench to create a level base for the stones.
- Place the Stones: Lay the stones, bricks, or pavers into the trench, ensuring they are level and aligned.
- Tap into Place: Use a mallet to gently tap the stones into place, ensuring they are firmly set in the sand.
- Backfill the Trench: Fill the trench with soil, pressing it firmly against the stones.
5. Concrete Edging Installation
Materials Needed:
- Concrete mix
- Wooden forms
- Stakes
- Trowel
- Level
Steps:
- Plan the Layout: Outline the area where you want to install the edging using a garden hose or string.
- Dig a Trench: Use a spade to dig a trench along the marked outline. The trench should be deep enough to pour the concrete.
- Build the Forms: Construct wooden forms to hold the concrete in place. Secure the forms with stakes.
- Mix the Concrete: Prepare the concrete mix according to the manufacturer’s instructions.
- Pour the Concrete: Pour the concrete into the forms, filling the trench completely.
- Level the Concrete: Use a trowel to smooth and level the surface of the concrete.
- Remove the Forms: Allow the concrete to cure according to the manufacturer’s instructions, then remove the wooden forms.
Maintenance Tips for Garden Edging
Maintaining your garden edging is essential to keep it looking good and functioning effectively. Here are some tips for maintaining different types of edging:

1. Metal Edging
- Inspect regularly for rust or corrosion and treat any affected areas promptly.
- Clean the edging periodically to remove dirt and debris.
- Tighten any loose stakes or connectors to ensure the edging remains secure.
2. Plastic Edging
- Check for cracks or brittleness, especially in older plastic edging, and replace any damaged sections.
- Clean the edging regularly to prevent the buildup of dirt and debris.
- Ensure the stakes are still secure and replace any that are loose or missing.
3. Wood Edging
- Inspect for signs of rot or pest damage and treat or replace affected sections.
- Apply a wood preservative annually to protect against moisture and pests.
- Ensure the stakes are secure and replace any that are loose or damaged.
4. Stone Edging
- Check for any stones that have shifted or become loose and reposition them as needed.
- Clean the stones periodically to remove moss, dirt, and debris.
- Refill any gaps with sand or soil to maintain stability.
5. Concrete Edging
- Inspect for cracks or chips and repair any damage promptly.
- Clean the concrete periodically to remove dirt and stains.
- Ensure the concrete remains level and adjust as needed.
Creative Garden Edging Ideas
Garden edging doesn’t have to be purely functional; it can also be a creative element in your landscape design. Here are some unique and inspiring garden edging ideas:
1. Recycled Materials
- Use recycled materials such as glass bottles, old bricks, or reclaimed wood to create eco-friendly and unique garden edges.
2. Living Edges
- Plant low-growing, dense plants like thyme, lavender, or succulents along the edge of your garden beds for a natural and living border.
3. Patterned Pavers
- Arrange pavers or bricks in interesting patterns such as herringbone, basket weave, or circular designs for a visually striking edge.
4. Mosaic Stones
- Create mosaic designs using colorful stones, tiles, or broken ceramics to add a touch of art to your garden edges.
5. Log Edging
- Use sections of logs or branches to create a rustic and natural-looking garden edge.
Final words
Without a doubt, gardenedgingexpert.com/blog is a great and suitable option for those who want to maintain their garden. It helps in preventing your garden from dirt and rusting and also helps in the overall maintenance of the garden. Hence, it is an ideal option for the gardeners. Tell us your thoughts on the same in the comments section. See you in the next blog. You can check more of our blogs on our website. Till then, bye. Have a nice day folks!
Conclusion
Garden edging is an essential component of a well-maintained and visually appealing garden. By understanding the benefits, types, materials, installation processes, and maintenance tips, you can create beautiful and functional garden edges that enhance the overall look and health of your landscape. Whether you choose metal, plastic, wood, stone, or concrete, the right garden edging will provide both aesthetic and practical benefits for years to come. Embrace your creativity and explore different edging ideas to make your garden truly unique and enjoyable.